The long dry season has ended. Creeks are flowing and the air is cool. This is perfect weather for climbing big hills, exploring thick forests, and getting wet feet.
Continue Reading
Category: Geocaching
Bath Time

It’s taken two years and a couple of attempts but today Aaron and I finally made it to Dianas Bath.
Dianas Bath is a spectacular rock pool in the northern section of D’Aguilar National Park, fed by Byron Creek. It’s very difficult to get to – even if you have a 4WD (which I don’t), and it’s surrounded by steep hills, thick scrub and large boulders.
Todays ride started at the bottom of Wirth Road at Laceys Creek.
We slowly ground our way 6km to the top of the hill, then meandered through the forest until we reached Jacky Creek Road. This is a steep descent which switches back and forth down the mountain and devolves into some really fun steep single track towards the bottom.


Jacky Creek is a quiet pretty stream, but it flows in all weather, so it’s a bit of a challenge to cross. We managed to get to the other side and stay dry, which was quite an achievement.
From there we followed Dianas Bath Road to the end. This is a steep climb followed by a steep descent. In the past I found it so steep I had to push the bike in some parts. Today I just kept my head down and kept pushing the pedals around, and made it to the top. I was really pleased to tick this hill off the list. I must give credit to my riding buddy, Aaron, who spurred me on.
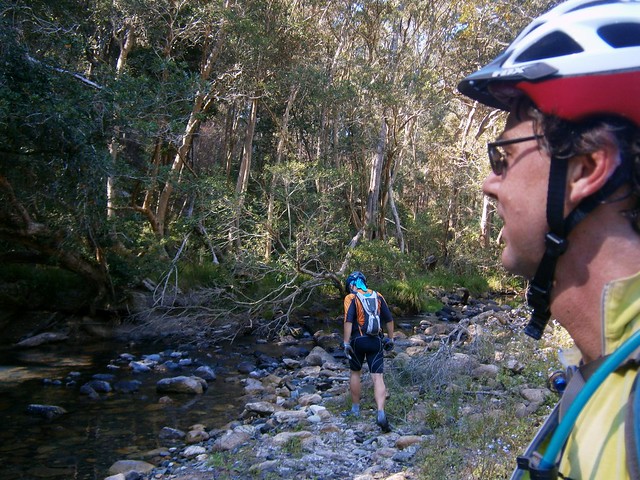
Eventually we had to leave the bikes behind and rock-hop along Byron Creek. This is tough because cycling shoes aren’t designed for walking in. Mine have carbon-fibre soles which hard hard and slippery. Walking on rocks in shoes like this is really difficult. In addition, the track was overgrown, we had to scramble over a few fallen trees, and the banks either side of the creek are steep and strewn with boulders. Oh, and did I mention the thorny “wait-a-while” vines that wrapped around our limbs?

After about half an hour of scrambling along the creek, we finally reached Dianas Bath. I was delighted. It was prettier (and bigger) than I imagined. My only regret was not bringing some swimmers. This place would be a lot of fun to swim in.

Aaron took his shoes off and waded in the water while I kept scrambling around on the edge of the pool looking for a Geo Cache.

My friend, Paul, created the Dianas Bath Geocache a few years ago. A Geocache is a small container containing trinkets and a log book. There are millions of them hidden all over the place. You can find out more here. I was delighted to finally log this cache after two years.

From there we headed back towards Mount Brisbane Road for the ride back to the cars, dodging lots of friendly goannas along the way.

Today we rode 52km in about five and half hours (including stops). We climbed about 1,750m of vertical ascent. I burned about 5,200kcal.
The ride included many slopes in excess of 25%, and some gradients in excess of 30%. This means you need to be fit enough to ride up the hills (or push your bike up), and confident enough to ride down them. Some of those slopes are slippery with dust or gravel.
I’m rating this one 9 out of 10 on the tough-o-meter. Take lots of water and plenty of snacks. Don’t do it in wet weather. Watch out for 4WD’s.
Thanks Aaron for a fun ride 🙂
Note: Dianas Bath is on private property. The owner currently allows walk-in access only. Please treat it with respect, clean up any mess you make, take all litter with you, and be courteous towards anyone else who is using the waterhole.
Total climbing: 1843 m
Average temperature:
Total time: 05:29:19
More data
Review: Magellan Explorist 610

The good folks at Mitac Australia recently lent me a Magellan Explorist 610 for review. The 610 is described by Magellan as “a touch-screen product, with customisable hard buttons, a 3-axis compass and altimeter, camera to take geotagged photos and a micro SD card for an expandable memory of 32 GB”.
The model I received was from the USA. It came pre-loaded with hundreds of U.S. Geocaches. I’m assuming that when the Australian version is released it will come pre-loaded with Aussie Geocaches which should be great for Geocaching fans.
I’m a mountain biker who sometimes does a bit of Geocaching. So a primary concern for me is how usable a GPS is on the bike. I mentioned this to Mitac Australia, and they kindly sent me a handlebar mount for the GPS so I could take it on rides.
What do I like about this GPS?
1. Tough. The 610 is build from sturdy moulded plastic. It feels solid, and I’m quite confident it could take a pounding on the trail. The display feels like it’s built to last. For anyone who currently uses a smart phone for on-the-trail navigation, you’ll be much more confident exposing the Explorist 610 to the rigours of outdoor life than your much more delicate phone.
2. Waterproof. Flooded creeks and rain aren’t a problem for the 610. As someone who has lost a couple of expensive mobile phones to water damage while riding, this is a big plus.
3. Maps. The contour maps give you a great idea of the steepness of the terrain. It seems to have a complete set of the suburban roads in my area. It also has a few (but not all) of the local trails in my area, so it’s handy for navigating around local streets. You can set the view to be either 2D or 3D which gives you a different perspective of the lay of the land, and comes in handy when you’re up in the hills and want to get an idea of how steep the land is around you.
The Explorist also gives you the ability to install your own maps instead of the pre-loaded maps. This is great for Open Street Map enthusiasts who prefer more frequently updated user-generated maps such as Maps 4 Me.
4. Camera. The 3.2 mega-pixel auto-focus camera is easy to use. One of the buttons on the case of the unit is pre-programmed to activate the camera, so it’s really easy to point the 610 at something interesting, and quickly take a photo. You can also take videos. What I really like is being able to take photos even when it’s raining. Who in their right mind would get out their mobile phone, or digital camera in the middle of a rain storm? By making the 610 waterproof AND putting a camera in it, you effectively have an all-weather waterproof camera. How cool is that?
Here’s a comparison of photos taken with the Explorist 610 (on the left) compared with the same shots taken on my Samsung Galaxy S2 smart phone (on the right). I think the 610 does pretty well considering it has less than half the resolution of the SG2:
| Explorist 610 (3.2 mega-pixel) | Samsung Galaxy SG2 (8 mega-pixel) |
 |
 |
 |
 |
5. Touch Screen. One of the fears a cyclist has of a touch screen is how easy it will be to use with gloves. This screen seemed to respond to my requests accurately, even though I was wearing full-length Fox Dirtpaw gloves. It was easy to use with gloved hands, and the menu navigation seemed quite intuitive.
6. Software. The 610 doesn’t come with any installation media, but you can download and install Vantagepoint which lets you exchange routes, tracks, media, data between your computer and the GPS. The software is easy to use and has all the functions I wanted.
What don’t I like about this GPS?
1. Batteries.
You need to put batteries into the 610. It’s NOT one of those units you just plug in via USB at the end of the day and wait to recharge. You have to open it up and put batteries in it. The manufacturers recommend two AA Lithium batteries which they say will last about 16 hours. I got considerably less than this with the two Lithium batteries I used, but I’m willing to blame this on the batteries, not the unit. You can also use rechargeable batteries, but not cheap ones. You must use heavy duty rechargeables – the sort you’d put into a hungry digital camera. When using good rechargeables I was able to use the 610 for most of a day without the batteries dying.
A pair of AA lithium batteries will set you back about $AUD 10. I spend about 12 to 15 hours per week on the bike, so I would need to purchase batteries almost weekly, which doesn’t make sense for me.
One major improvement the manufacturers could make make to the Explorist 610 would be to let you recharge it by plugging it via USB. Competitor products do this already. I think it’s essential.
2. How do I get the software?
The Vantagepoint software is great. The problem is that when you get the unit out of the box, there’s nothing to point you in the right direction and tell you that you need to go to http://www.magellangps.com/VantagePoint to download the software. And there’s no CD. As a new buyer how do you even know there is a thing called Vantagepoint? The box tells you to go to http://magellangps.com/support from where you can download manuals for Vantagepoint, but there’s nothing to tell you how to download the actual software. Thankfully Google pointed me in the right direction.
Also, there are a couple of minor issues with the Browser Plug-in – Magellan Communicator. This is the bit of software that lest the 610 communicate with websites while it’s plugged into your computer via USB. The plug-in didn’t seem to install correctly into my Firefox browser. It also wouldn’t install into my Internet Explorer 64 bit browser. I did manage to get it to install into my Internet Explorer 32 bit browser, but it continually asked me to upgrade the plug-in, even after upgrading it several times. I’m sure it’s a temporary issue, but if this happens to you too, rest assured you’re not going crazy 🙂
3. Resetting / Not Resetting Track logs.
This has to be the most frustrating issue with the 610.
Most people who go out exploring with a GPS would like that GPS to record their adventures – this makes it easier to brag to your friends about the wonderful places you’ve been. After your journey, you come home, plug in the GPS, download your adventures and you’re ready for the next adventure.
The problem is you’re not.
The next time you go out with your GPS and turn it on, it appends to your previous track by default. So if one day you’re hiking in the Gold Coast hinterland, and the next day you’re mountain biking in D’Aguilar National Park, the 610 doesn’t automatically split then into separate tracks – even though you might have downloaded your first hike onto the computer before starting your second adventure. So at the end of your subsequent adventures, you discover that you don’t have a track log of your outing, you’ve got a breadcrumb trail going all over the countryside spanning multiple adventures.
The trick is you have to manually tell the 610 to save one track, then clear the track log and start a new one.
If you don’t remember to do this before each new outing, you won’t get the track log you expected.
But wait… there’s more! Suppose, during your hike or ride, you decide you’d like to find a Geocache. So you navigate to the Geocache section, pick a particular cache, and tell the 610 to take you to it. The problem is the unit will then cancel your current track. If you wanted to search for several Geocaches, your log for the day would be split into several different fragments.
So on the one hand the 610 doesn’t split the track log when you’d expect it to, but it DOES split the track log when you don’t expect it to.
A simple solution would be to automatically split the log after an upload via Vantagepopint, or after several hours of inactivity. And to allow searching for Geocaches without breaking the track log.
4. Seeing nearby Geocaches.
Having a pre-loaded database of Geocaches is a great advantage and a big plus for the Explorist 610.
The problem is that while using the unit, you have no idea that there might be a Geocache nearby. On most GPS units I’ve used, you put the Geocache details in as a way-point, then whenever you’re in the vicinity of the way-point it appears on the GPS map screen. This encourages serendipity. You’re out hiking and you see a cache on the map and think to yourself “Hey, there’s a Geocache nearby. Let’s do it!”.
On the Explorist 610, if you want to find a Geocache, you have to navigate to the Geocache section of the menu, and select the Geocache you’d like to find. Unless you do that, you could be looking at your map screen, and since you haven’t asked for it, you’d be totally unaware that a geocache was only 10 or 15 metres away.
What use is a huge on-board database of Geocaches if the unit doesn’t let you know they’re close by when you’re navigating somewhere else?
5. Bike Mount.
It’s great being able to mount the GPS on my bike handlebars.
But (most?) handlebars are tapered. In other words they’re narrower at one part than they are at another part. The handlebar mount is attached via zip-ties. The problem is when you tighten the zip-ties to fix the mount to the bars, they squeeze on the tapered bars and push the mount sideways. So the handlebar mount inevitably loosens up after a few minutes of bumpy riding, and the GPS unit slides downwards to face the ground, making it unusable.
The work-around is to put the handlebar mount on the stem rather than the bars and twist the GPS connector 90 degrees. But this is not always possible. Some stems are flat which means the handlebar mount doesn’t fit as snugly.
The problem is compounded by the fact that the GPS is fairly heavy, and it’s not mounted at its center of gravity. So the weight of the GPS pulls down on the mount, which causes the unit to slip around and face the ground.
There’s a missed opportunity here. If the GPS was mounted closer to its center of gravity, the on-board camera would sit higher above the bars. This means it would be easy to use the unit to take videos while riding the bike. Since it has reasonably good resolution for video, and it’s waterproof, it would be ideal for this purpose. I admit it’s a left-field idea, but you can’t do it with the current handlebar mount because the camera doesn’t sit high enough above the bars, so the handlebars get in the way of any video / pictures taken while the unit is mounted.
6. Planning Routes.
Anyone interested in exploring our wonderful world with a GPS will eventually want to enter a route into the GPS so they know where they’re going.
The Vantagepoint software lets you do this, but it only lets you set a maximum of 100 points. This might be ok for a short walk in the forest, but for a 50km to 100km adventure in the mountains, it’s nowhere near enough.
Thankfully there is a workaround. Basically you create your route in Google Earth, convert it to a GPX file (using something like http://GPSies.com) then load it into the GPS as a track. It then appears in the GPS as somewhere you’ve been before, and you can load the track to assist you with navigation.
7. Map colors.
Personally, I find the map colors difficult to read while riding the bike. It’s much easier to read maps that have a light background and dark tracks rather than the current configuration on the 610 which shows light tracks on a dark background.
The screen is nice and bright, the colors are vibrant, but in bright sunlight when you’re shooting down a trail at 40km/hr, it’s hard to get a quick glace of the screen and quickly know what’s going on.
One work-around for the map color issue might be to try some alternative OSM maps, such as Maps 4 Me.
8. Weight.
At first I wondered why the unit didn’t come with a lanyard so you could carry it around your neck. The I realized it would be pretty uncomfortable on a long hike having a 200 gram GPS dangling from your neck for several hours. I think when Magellan say “Hand Held” they really mean it. When you don’t want to hold the unit it might be more comfortable carrying it in a large pocket rather than letting it swing from a lanyard.
Bottom Line
This is a rugged GPS that comes pre-loaded with hundreds of Geocaches. It can take photos and videos while you’re outside exploring – even in the most inclement weather. It’s easy to use. I think it would be great for an afternoon of family Geocaching, or for an occasional trip out into the hills while you took a few photos – in any weather.
But, I don’t think a cross-country mountain biker was the best match to test drive the Explorist 610 🙂 It’s definitely not the sort of GPS you’d put on your bike if you planned on disappearing into the mountains for a few days. And it’s not a GPS you’d use as an everyday device to faithfully and effortlessly track your rides.
If you purchase one, make sure you buy some good rechargeable batteries!
UPDATE 7-Feb-2012
Here are some responses from the Product Manager about the “Things I don’t like”
- Batteries: There are various ways to improve battery life as well, turning off the backlight, using active suspend. You hit the power button and select suspend mode. It still records your track but turns off all the functions you don’t need to save power.
- Software: Valid point about not being clear that VP exists in the documentation and we have addressed this with the team who control this area. There will be a new version of VP available in about 2 weeks which will fix the plug in bugs. So we encourage Neil to update VP in a few weeks to see if that makes a difference.
- Track Logs: I see his point about not having the ability to save tracks on every power cycle, but I really like how we handle tracks. All one has to do is hit “Start” on the main menu when you start your activity and it will log everything you do from that point forward, including all the waypoints, photos, etc you collect along the way. Also, regarding the geocache scenario he described, folks LOVE that we don’t separate the portions of the track when you’re not actively looking for caches and when you’re on the hunt.
- Preloaded Geocaches: The preloaded caches (999) are intended to just be something pretty to look at when folks are fondling the device at retail. Most geocachers know they have to set up a pocket query for their geographic area to get an acceptable density of geocaches.
- Bike mount: The mount is indexed every 45 degrees, so I suggest he move the mount to his stem (piece connecting the handlebars to the fork), then adjust mount orientation by removing the screw that holds the mounting plate to the mount, then rotating it 90 degrees to have a portrait screen orientation.
- Routes: Most people are using .GPX files these days for route planning, so he’s identified what I would recommend.
- Map Colors: We have adjusted colors a few times, but there’s still room for improvement
- Weight: I recommend Lithium batteries to folks who complain about the weight as lithium v/s alkaline is quite impressive (as lithium batteries are non-aqueous).
Geocaching in Upper Caboolture
Here’s some pictures of our Geocaching (http://geocaching.com) expedition today. If you like discovering new places, and don’t mind the challenge of trying to find something that has been craftily hidden, then you might really enjoy Geocaching. All you need is a GPS and a sense of adventure.

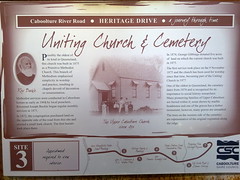
This is a historic church and cemetery in Upper Caboolture where we found a geocache. I was bowled over when I found the grave of a woman who had been born in 1799. The peaceful rural views are beautiful.

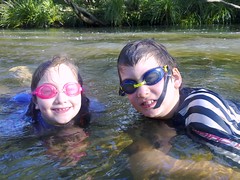


I also took the family back to Zillman’s Crossing to find a Geocache there.
We didn’t end up finding it because I think it got washed away in the recent floodwater after the rain.
Rocking Horse Poo
Rocking Horse Poo. A Geocache in Petrie. So that’s what it looks like 🙂
We had fun finding a Geocache today entitled Rocking Horse Poo. Lilly and Sophie had fun and even picked some of the stuff up.
The imagination of Geocachers never ceases to amaze me!
If you’ve never tried Geocaching, our family would recommend it. It’s a great way to get outside on a Sunday afternoon and have fun.
We love Geocaching!

We love Geocaching!
Originally uploaded by MagicTyger
We’ve had a great time today finding some geocaches in Toowoomba. Here’s a picture of us all relaxing after the third find of the day!
Camera in a Tree Stump
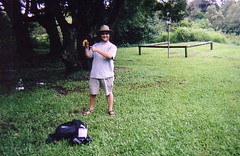
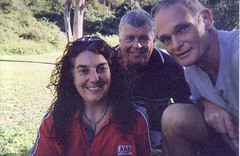
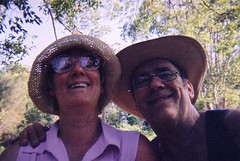
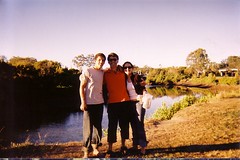
A year ago I hid a disposable camera in screw-top container in a tree stump in a local park, and left instructions on the internet for people to find the camera, take a picture of themselves, and put the camera back.
Yesterday I retrieved the camera and had the pictures developed. You can see the result here.
What an enjoyable experiment! A montage of people (and dogs) – most of whom I have never met, all having fun.
If you’ve never tried it, I’d heartily recommend geocaching (http://www.geocaching.com) – probably the most fun you can have with a GPS receiver. There are thousands of hidden “caches” like this all over the world – probably just down the road from where you live.
I’ve put another disposable camera at the same location, so if you feel like getting outdoors and having some fun, try finding my geocache called “Only the Lawnleis”. You’ll need to discover a little bit about the local history of the area before you can track down the final location. It’s all on the site here.


